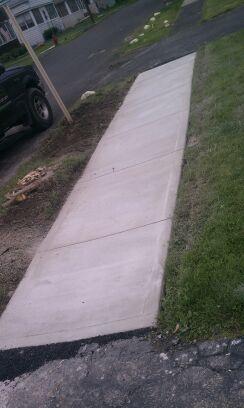
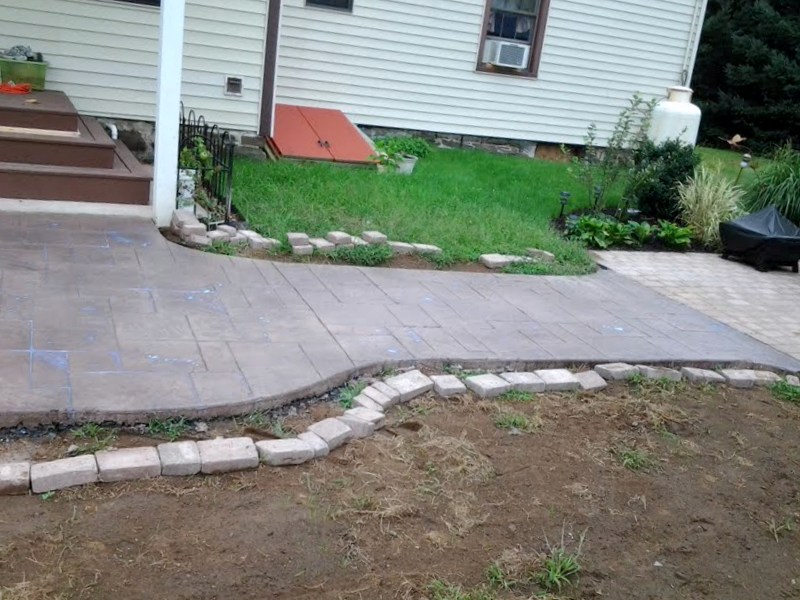
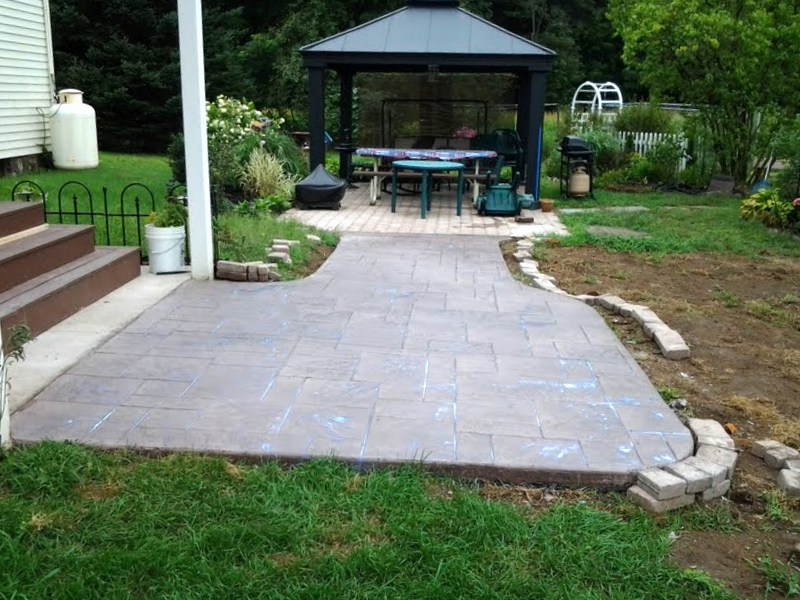
 Its been quite some time since my last post. The past month I've done quite a few jobs and I'm excited to share photos of my latest one with you. For this job, I put in a stamped concrete walkway. I used all new stamps and flexible forms which enabled me to get the crispest stamping and the curved, rounded edges. It turned out great and the homeowner and I were very happy with the end result. Check out the photos and let me know what you think!
 Today I'm pleased to share with you some photos of my most recent job. I've really enjoyed working on this one and have been looking forward to posting the "end product" pictures!
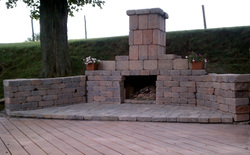
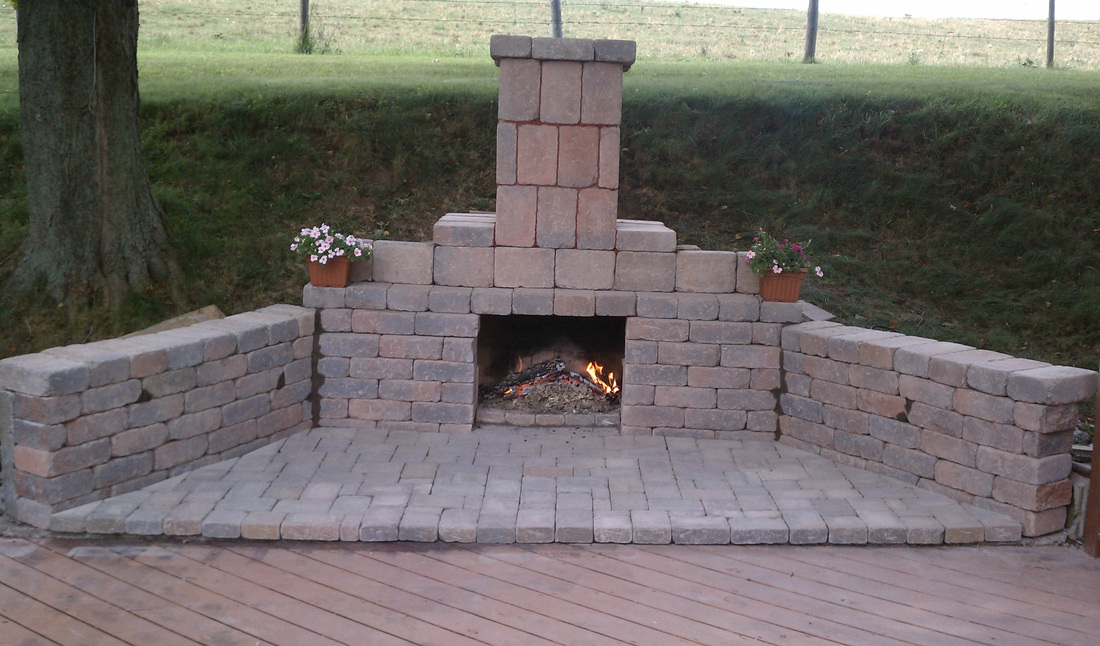
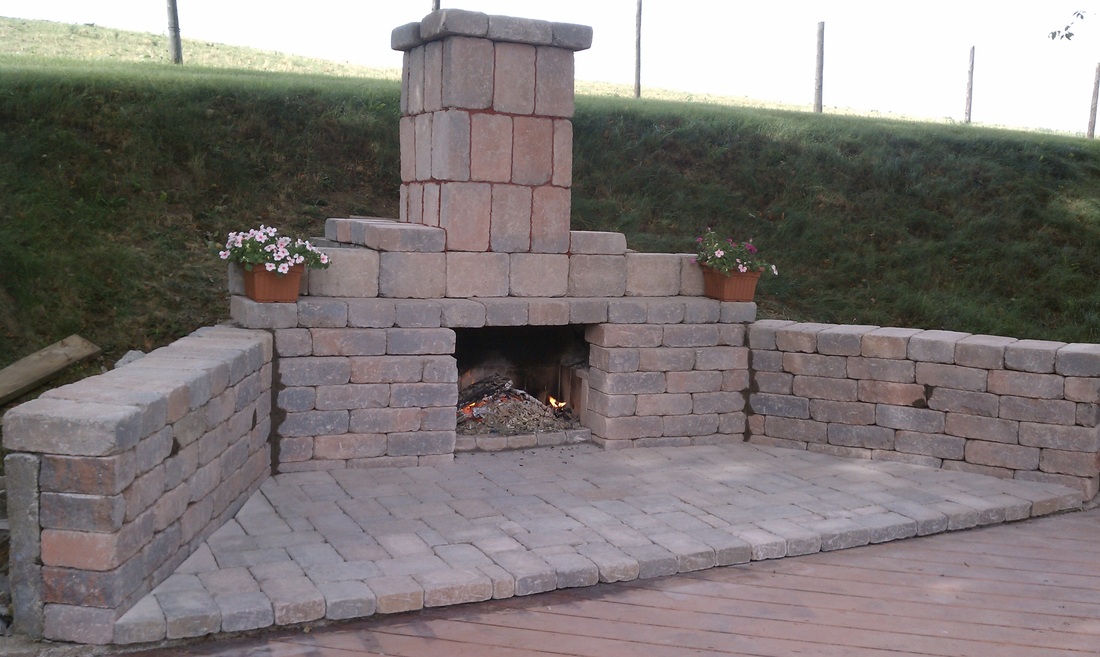
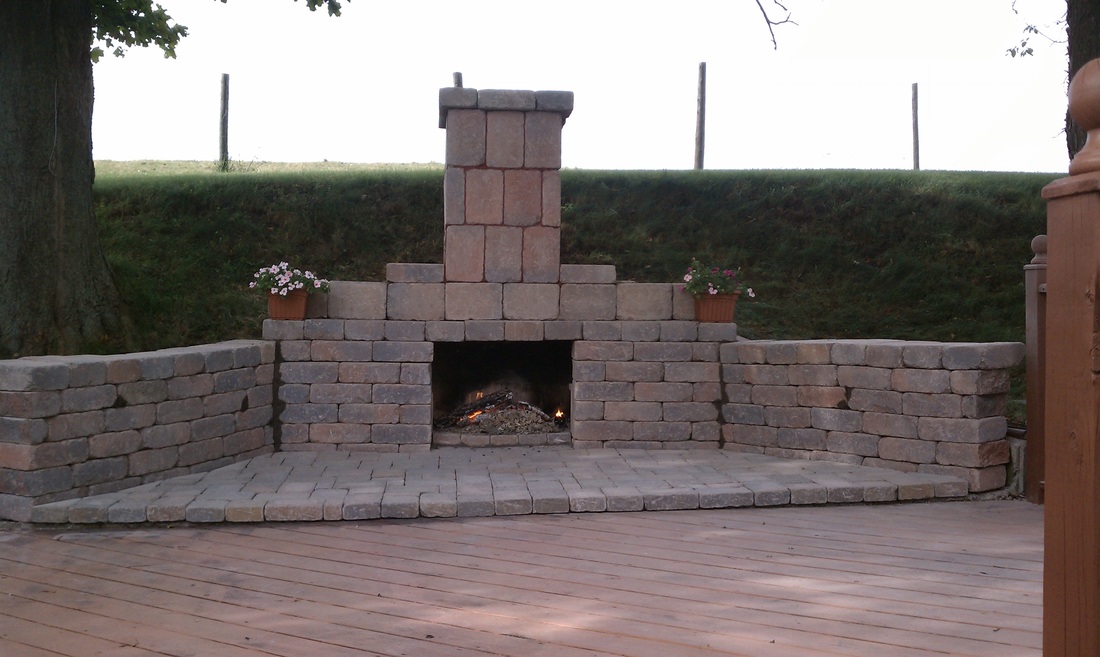
My clients had an old outdoor fieldstone fireplace that wasn't working right anymore and they decided they wanted to replace it with a new one, built to the proper dimensions for good drafting.
I used Belgard brand Weston wall blocks and Dublin Cobble pavers to create a fresh and functioning outdoor fireplace area.
Check out the photos and let me know what you think. And, if you are interested in creating an outdoor space similar to this one contact me and I'd be happy to discuss options.
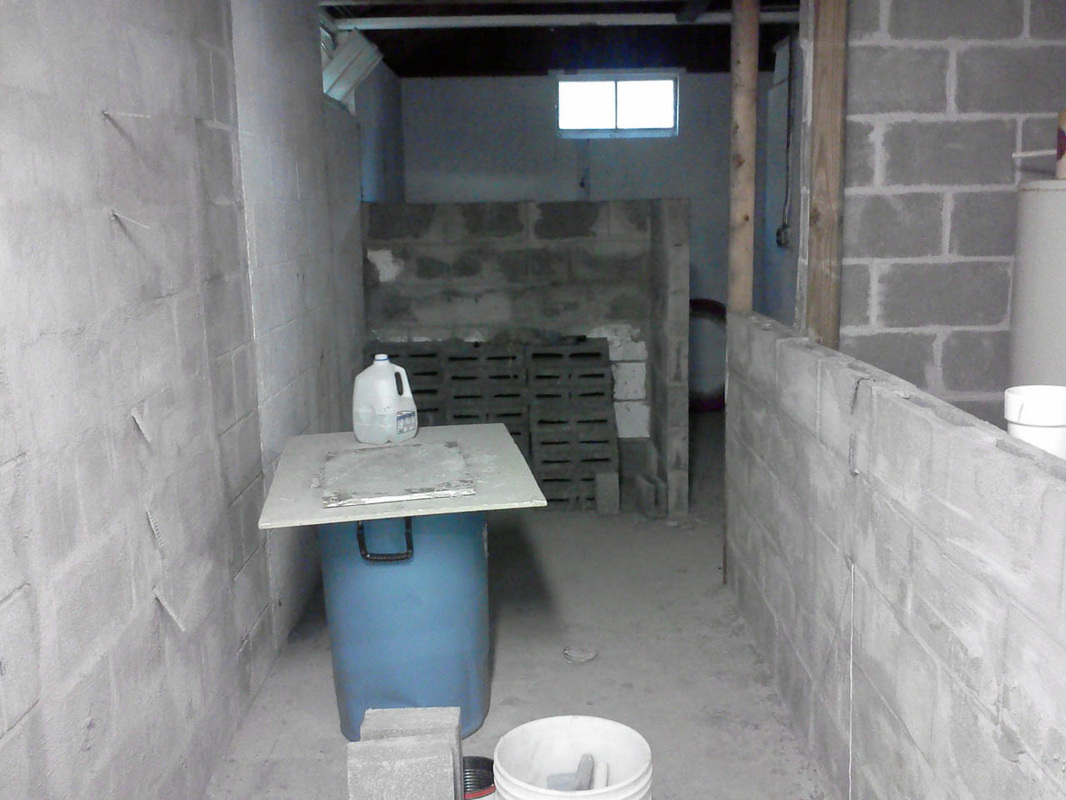
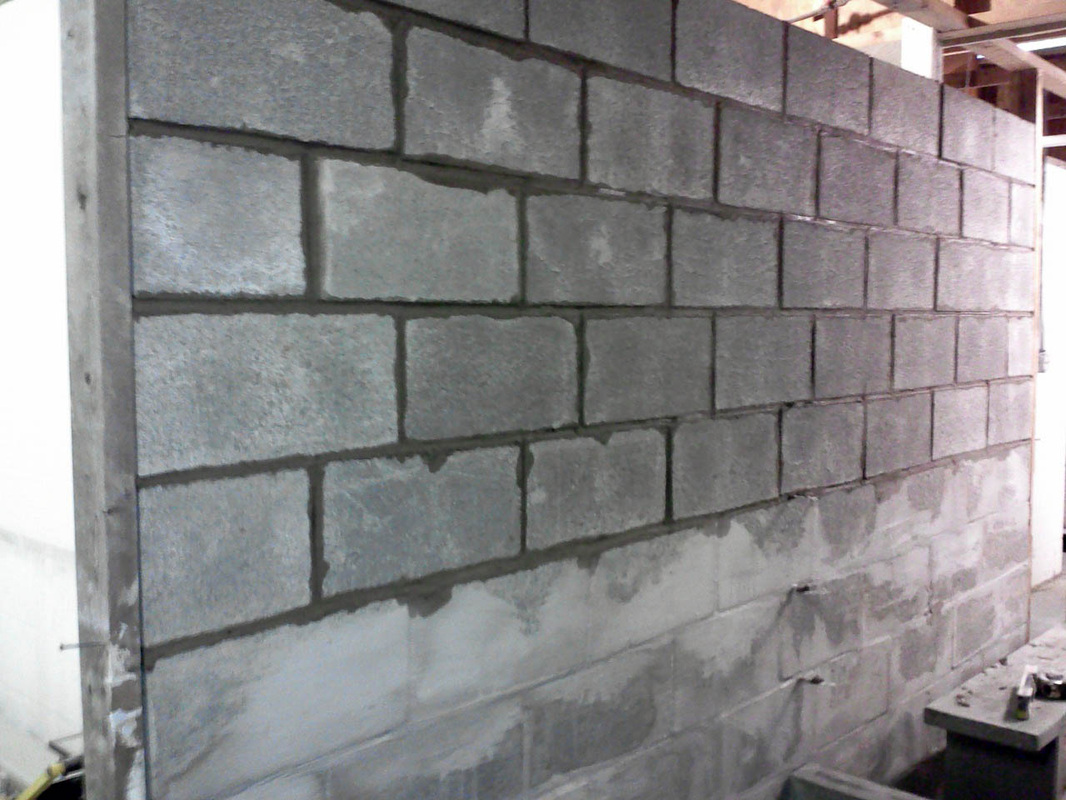
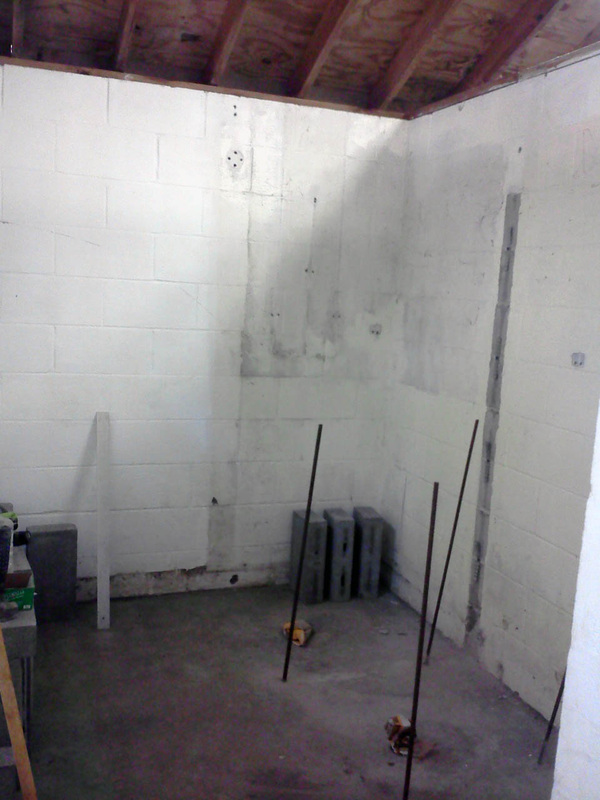
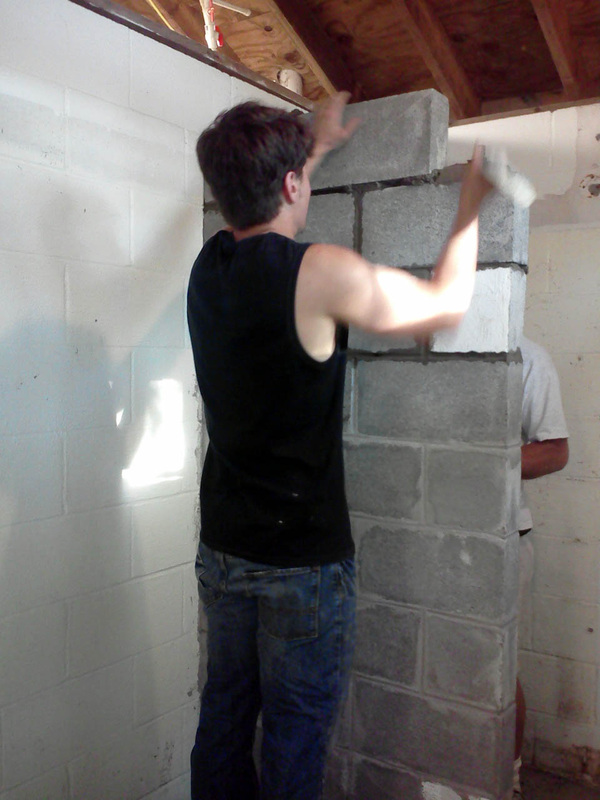
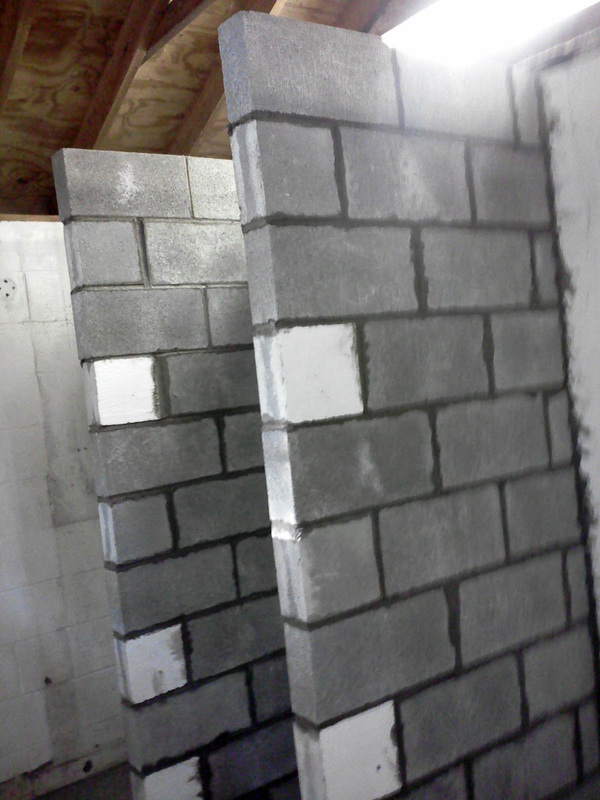
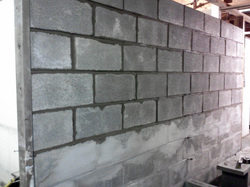 This past weekend I drove up to Ithaca to build interior block walls for a camp bathroom.
Sometimes I get called in when a homeowner (or campowner) attemts to do a project and then realizes it was a bit more difficult that they had anticipated. In this case, the camp had managed to get some of the walls started but decided the project would go quicker, and turn out better in the end, if they called in a professional.
I put up 158 blocks to create partition walls, and by the end of the day the camp was well on their way to having have a finished, usable bathroom space.
Check out the pictures and let me know what you think!
By the way, if you've started a masonry project that you aren't able to finish, give me a call! I'm happy to discuss options and help you turn your "to-do" projects into "done" projects!
 I've been working on a ton of projects in the past month and I'm excited to share some of them with you over the next few weeks.
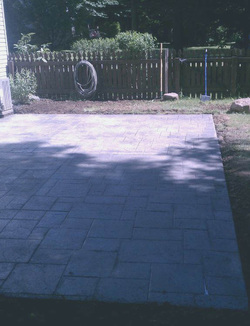
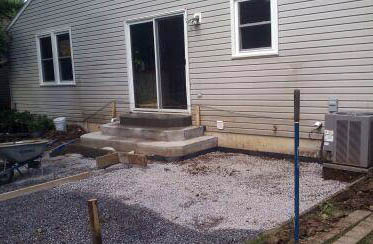
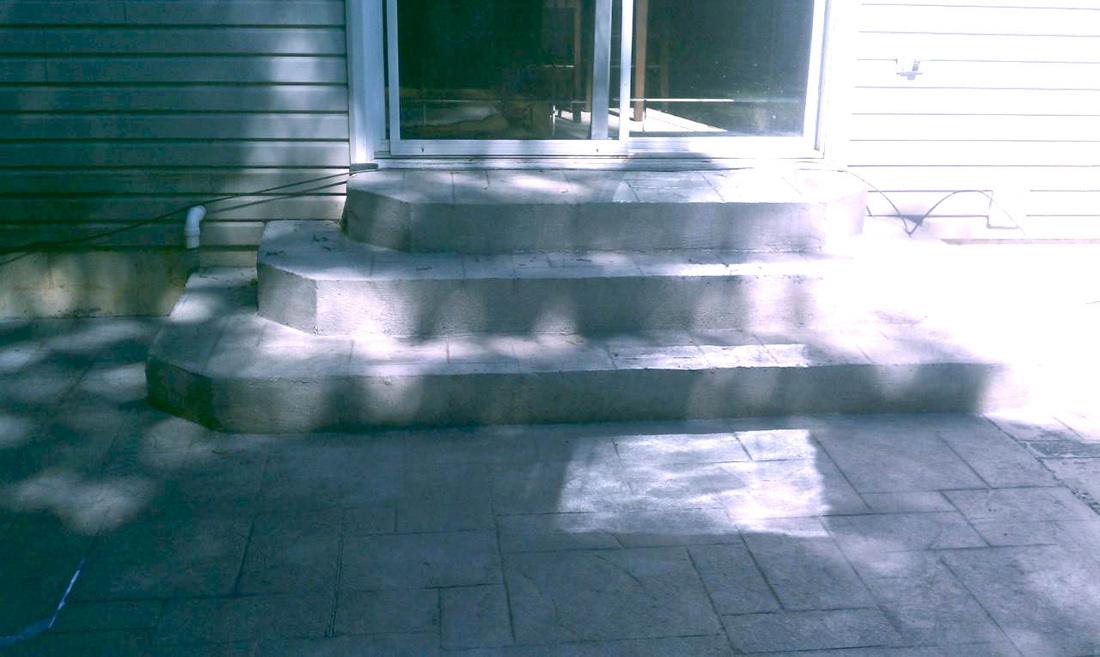
Today, here are some pictures from at 17' x 24' stamped patio I did with custom-made steps. It was 9 yards of concrete, which was stamped in Ashler Slate Pattern. The project turned out great and the homeowner is looking forward to using it this summer.
Stay tuned for some more photos of recent jobs next Wednesday!
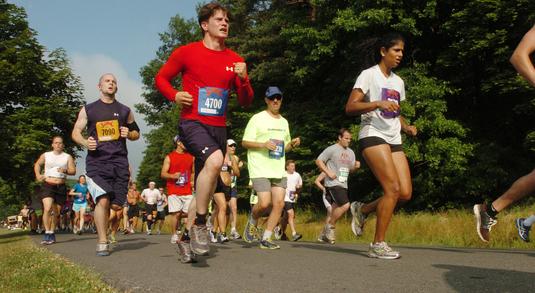
Fun fact- I ran in the Boilermaker 15k race in Utica this past weekend (along with about 14,000 other people). It was such an great experience! I clocked my personal best time and I'm looking forward to doing it again next year!
See you back here next week. Check out the photos and let me know what you think!
 This week I finished a project that I’m excited to share with you!
The job involved breaking out some bricks that were popping out and replacing them with new ones and stamping a patio.
I ended up needing to replace about 200 bricks. As I began looking for the specific style brick to match the current ones I found that the specific type of they were quite rare now, so, after talking it over with the homeowner we decided to go with some similar looking bricks from Syracuse.
After most of the brick work was done I pulled up the flagstones on the patio area and poured a 2” overlay on both the patio and front steps. I stamped the overlay in Ashler slate pattern, with a brick border. Afterwords, I added a black secondary color and stained the brick border red. Choosing color is an artistic endeavor and can sometimes be quite a project but in the end we were able to find a red that was suitable.
Check out the photos and let me know what you think!
 Training for a race is a lot of work but it’s helped me greatly in developing self-discipline over the past months. A lot of people I’ve talked to see training as a merely physical endeavor, but I believe training is way more than that. It’s more than getting "in shape" or looking attractive, it’s a lifestyle.
I run a lot; not because I have nothing else to do, but because I know that the better shape I am in the more efficiently I can work and the more effective my business will be. I am training for the Boilermaker race to push myself out of my comfort zone, sometimes until I'm winded and out of breath. (I have heard it said pain is weakness leaving the body, but I say pain is proof you’re still alive.) This is why training is not just a physical endeavor, it is philosophical. As you train, you have to make a conscious decision to exit comfort, and endure pain or discomfort.
It would be so easy to do what was good and right if there was no pain in achieving it, but pushing through the difficulties makes us stronger. This week I challenge you to train in something - run, walk, bike, swim... train your physical body. That way when you come upon a difficult problem, whether physical, emotional, or spiritual, you will have endurance and be able to choose to do the hard things for a long term benefit.
Lots of jobs are in the works, so stay tuned for some more final project pictures in the weeks to come. For now, check out the NEW “Photo Gallery” section of my site with pictures of some of my recent jobs.
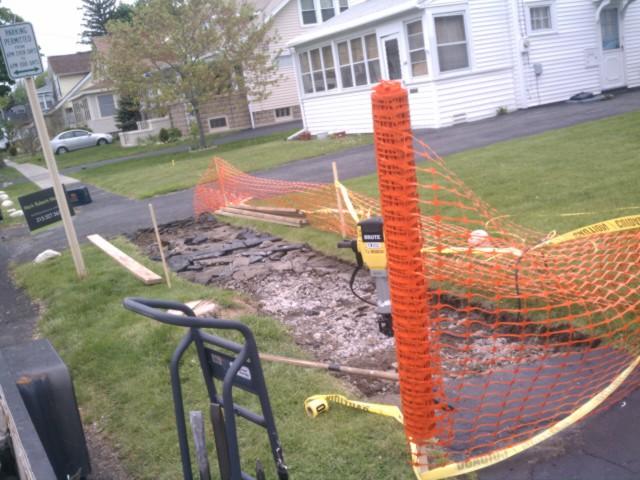
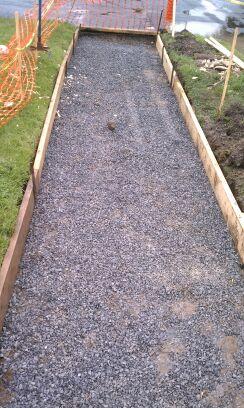
 Sidewalks are usually an “easy” project if you know how to do them, but City-owned sidewalks are a lot more complex due to codes and permit applications.
This past week I replaced a bit of Syracuse City sidewalks for a homeowner. The
project really started a month ago with the permit paperwork being sent to the
City for review. It took some time to get all the departments to review the
paperwork to make sure the project would turn out OK, but at long last I had the
clearance to go.
In Syracuse, the sidewalks are a two part sidewalk, consisting of a 4” base of 4000 psi concrete with a 1” top of sand mix. On the first day of the project I
hammered out the old sidewalk with an electric jackhammer and pulled out most of the rubble. I finished grading and setting the forms. By the second day I was
able to pour the base and top coat.
That night, around 8 PM as I was heading home from the job, the tire on my trailer blew. Another challenge after a long day, but it did not stop the work. The next morning I was able to pick up the forms and cut relief joints in the concrete.
The homeowner was happy with the sidewalk and it gave the street a new, clean
feel.
Check out the pictures and let me know what you think!
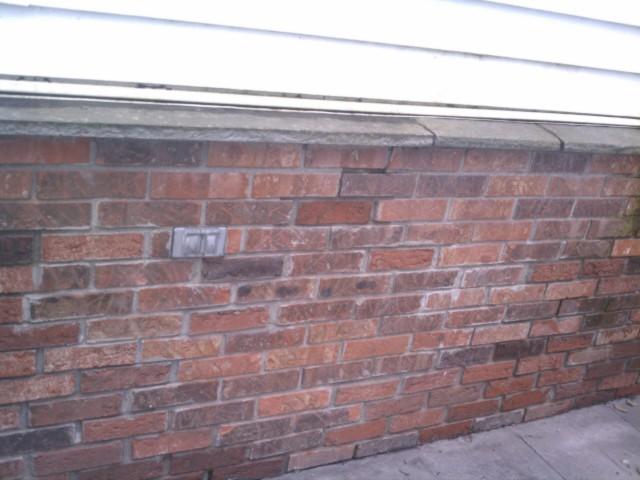
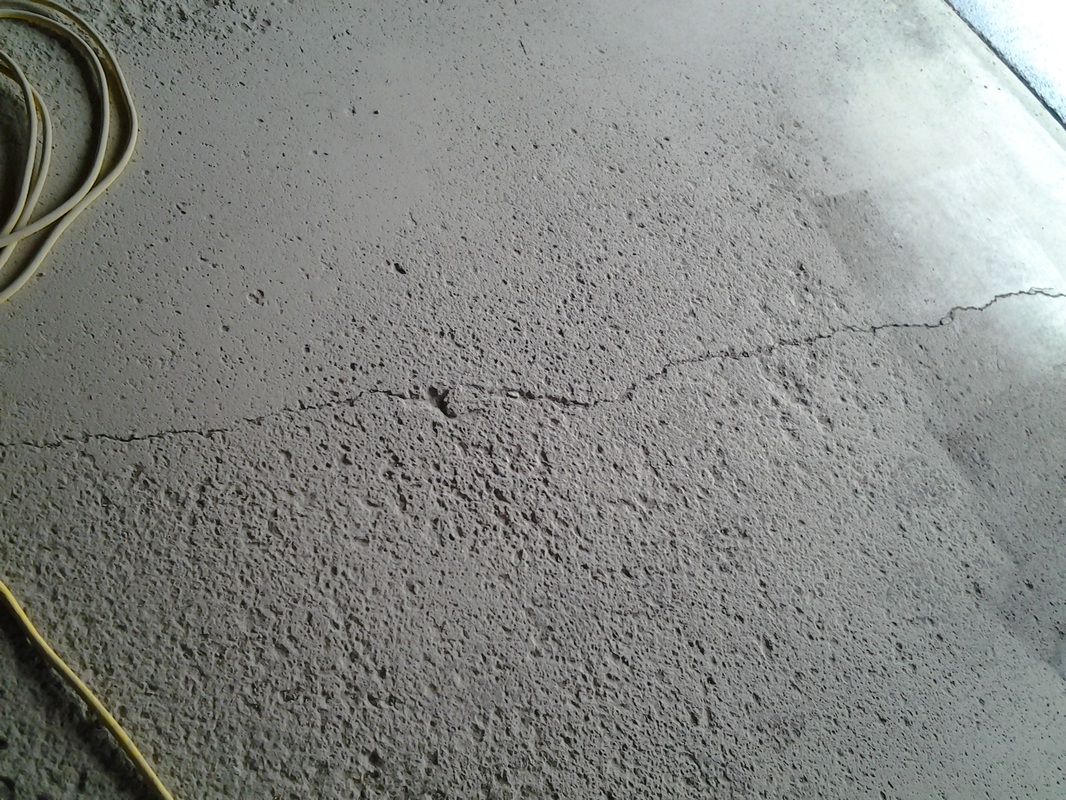
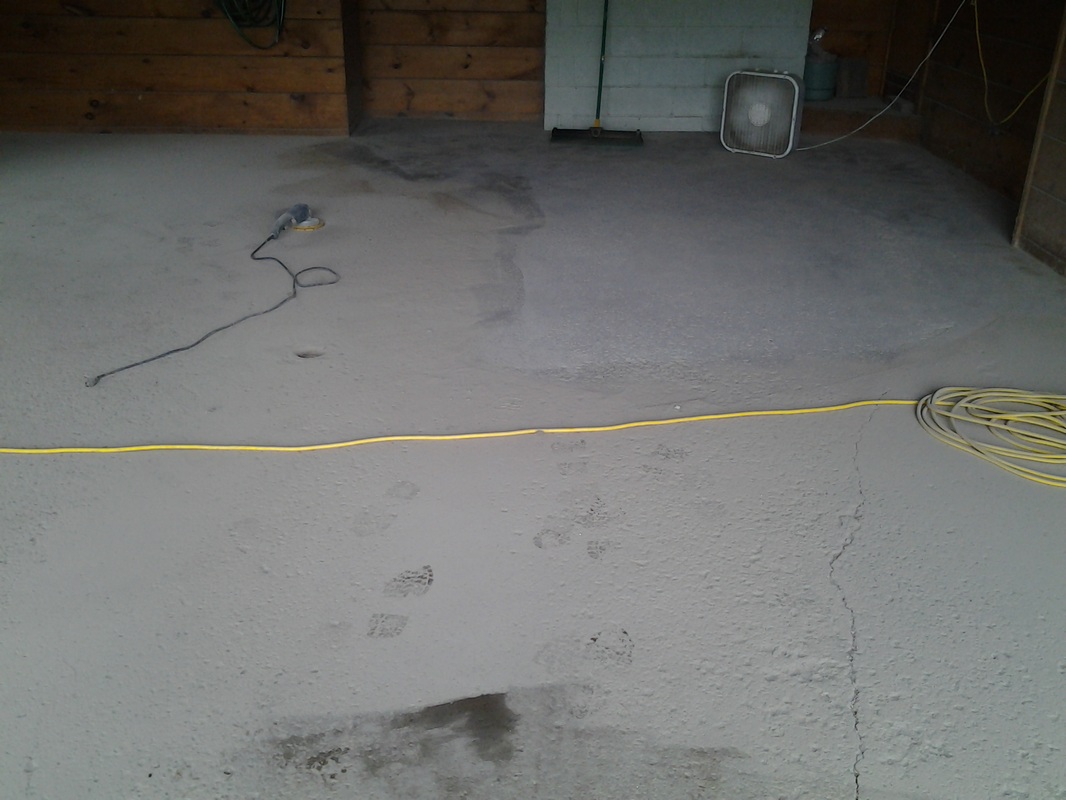
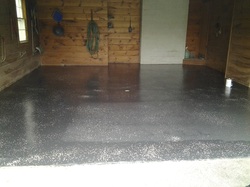 Fixing a garage floor is one thing, but making it look almost new is a much more
advanced task! The floor I was working with last week was extremely pitted and
pocked from the years of salt pulled in during the winter. The surface had been
further weakened by a poor finishing technique. The homeowner wasn't sure what kind of look worked with his budget and initially had an idea of going with a
plastic, tile matt cover. However, after we discussed it, he decided a tile matt
was more of a future plan. He decided to go with an epoxy finish for now.
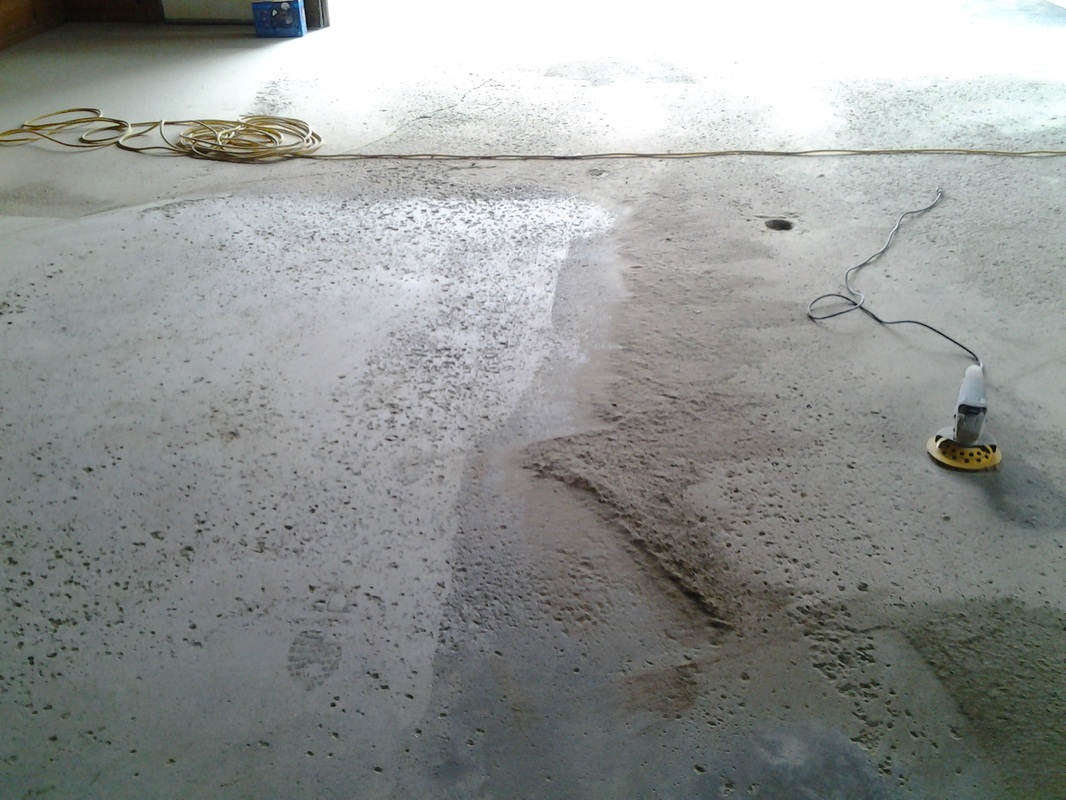
I first took about 1/16 of an inch off the surface by grinding, but the pocks were
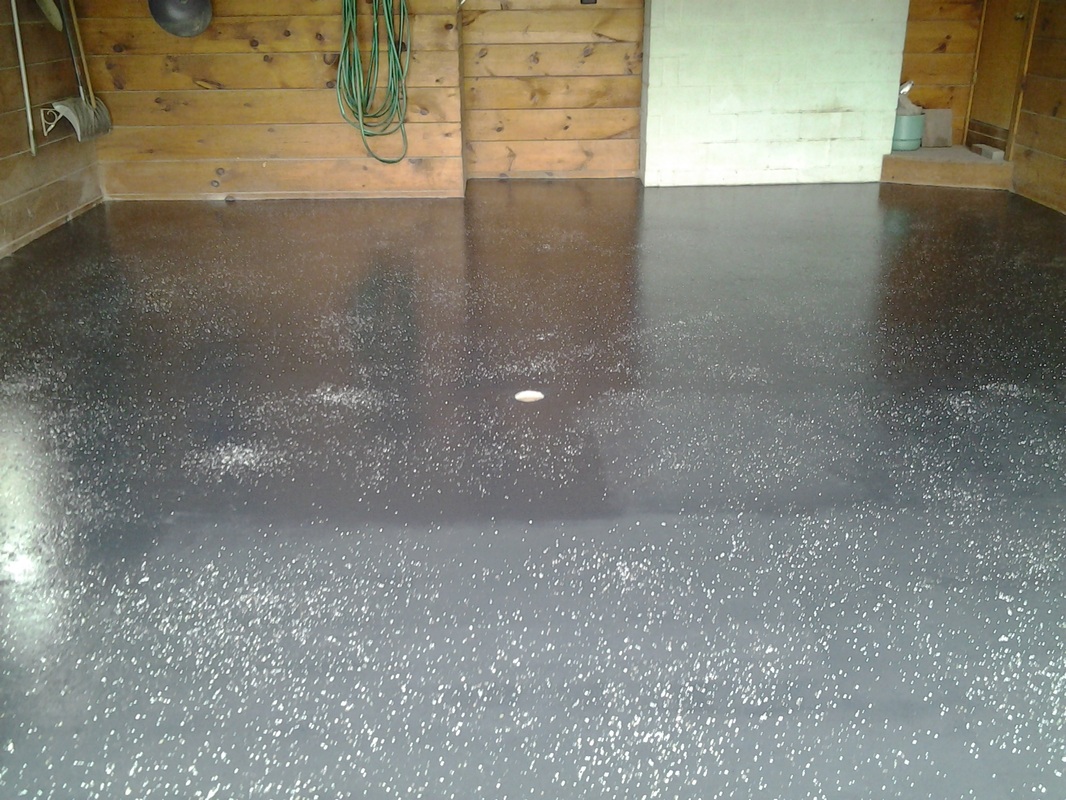
still quite visible. I then applied a top coat of Ardex. The application of this material was primarily to fill the existing divots a bit. With two to three coats they would have been completely worked out; I applied only one coat, though, because the rest would be well sealed and visually undetectable with the epoxy. After letting it set overnight I applied the epoxy. The color the homeowner selected was charcoal gray. One coat was applied in the early morning, followed by a second coat in the afternoon. The homeowner opted to add color chips to the surface as well as a clear acrylic finish coat.
By the end of this job the garage looked beautiful. The floor is in great shape, and is now protected for many winters to come. Most importantly though, the homeowner is very pleased with the way it turned out. He was a great guy to work with!
When you think you have seen the end of your garage floor, or other surfaces for that matter, keep in mind that there may be better options than replacing them. Restoration and refinishing may be easier on your budget while providing visual appeal and lasting protection.
Check out some pictures of the job below and let me know what you think!
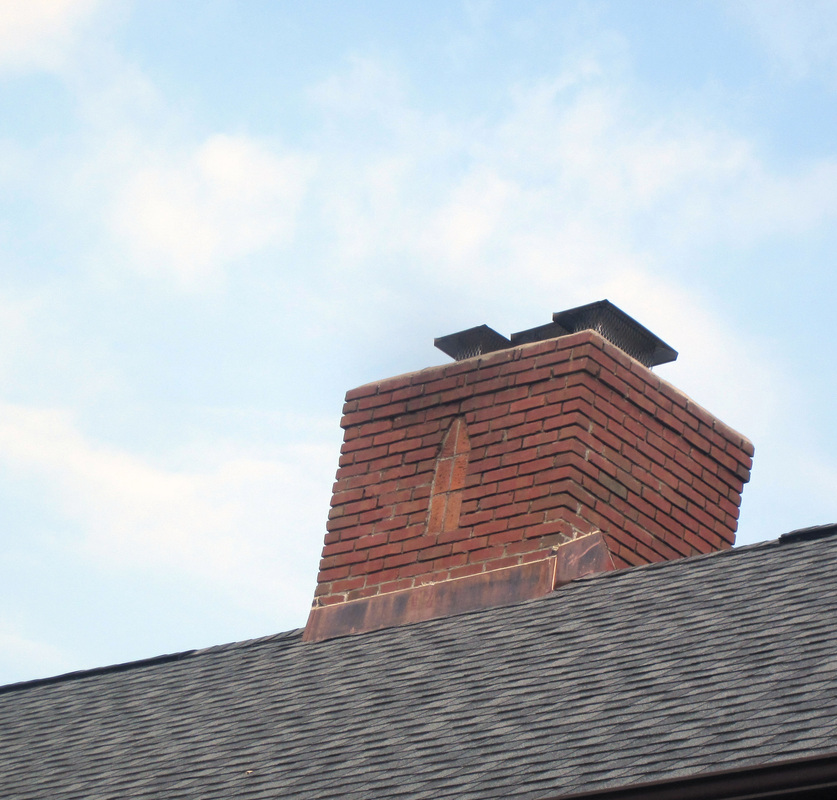
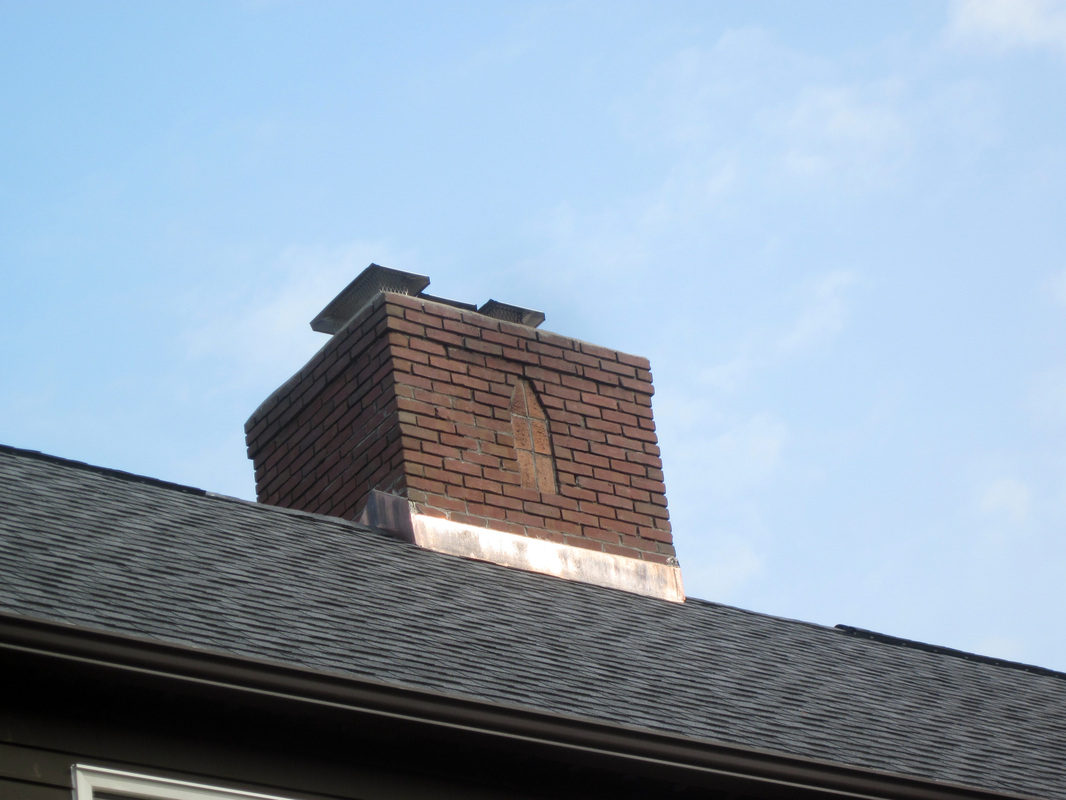
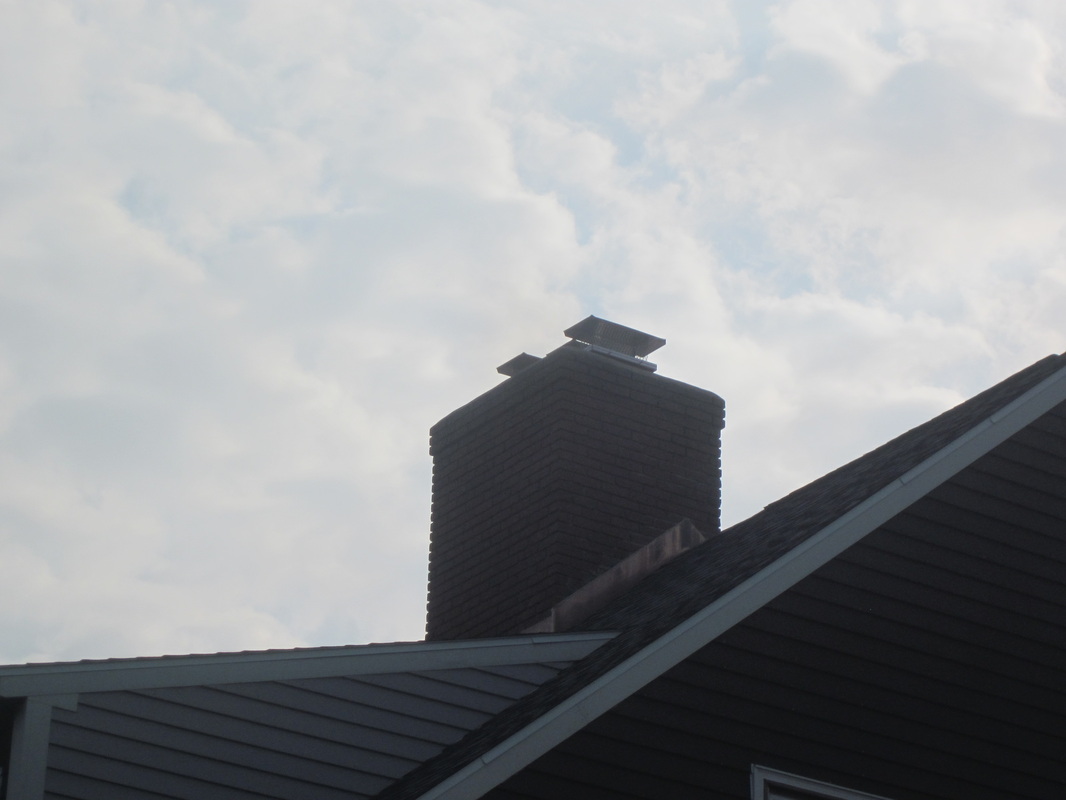
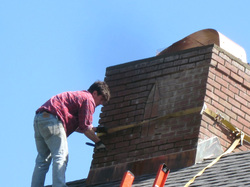 This past week has been full of adventure, which is part of the reason I didn’t get to my blog post last week. Aside from working on a chimney project I also took a road trip to Indiana and had my car broken in to, while parked in my driveway! Just wait till you hear the whole story…
I'll start with the chimney.
The homeowners contacted me because the chimney was leaking during heavy rain. While they knew they wanted the chimney to be leak-free they weren’t totally certain how they wanted the final product to look. I started by grinding out all the joints and repointing it. Then I removed the water shed and joined all of the flue cages to one large copper colored one. The overhang on the chimney cap was poured flush, with the ability to build it out. In the end though, the homeowners decided that they wanted it to be a little over 1”. They also decided they wanted to go with a different flue cage too. So I’m going back there to do some more work on it to get it just the way they want it. More pics soon. Sometimes it is hard to visualize what you want, but I’m happy to work with people so that they are satisfied with the end product.
On Thursday night someone rummaged through both my wife’s and my cars. We live in a quiet area, so it was quite a surprise to walk outside on Friday morning and see the car doors wide open! The burglar (s) went through our glove boxes and consoles, left things strewn about and the car doors open, but they didn’t take much at all. In fact, all that was missing was a flashlight and a book! It seems the people were just looking for untraceable items. God is good in everything and He definitely was watching over us and our safety!
We left Friday night for a great road trip! My wife and I survived two days of driving on only 3 hours of sleep, jellybeans, and coffee. On the way home, my brother decided to take a shortcut to save some time. Little did he realize he was taking us straight through scenic farm country- with roads full of Amish buggies. The highlight of the detour for us was seeing an buggy tied up to a pole outside Pizza Hut! It doesn't get much better than that!
After this weekend I’m glad to be out of the car actually moving around, and I’ve decided to invest in a home security system. Thankful for Gods many mercies and hope you have a great week.
Check out the pictures of the job so far and let me know what you think.
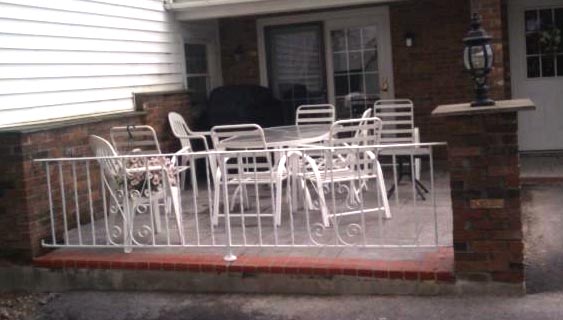
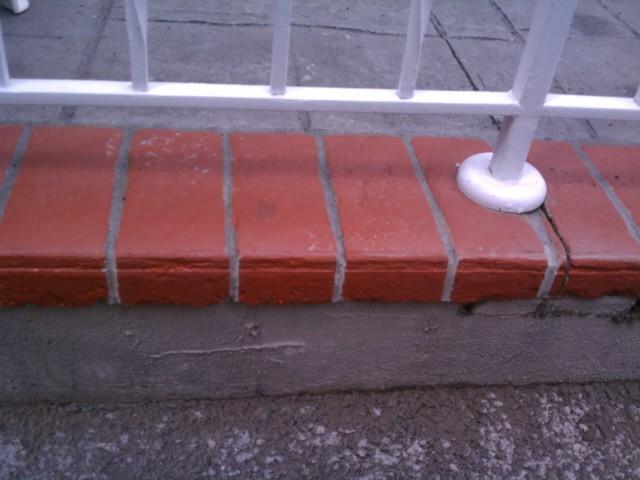
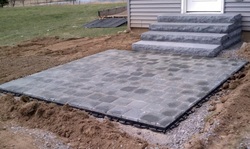 This past week I installed Cambridge paving stones. It was a great job, with a couple of twists. I have to give major props to everybody involved who helped make the job what it is.
The homeowner and I had agreed that he would do the excavating and order a load of stone for our base material. His week, and the start of the project, began with a crash when his excavator called and canceled on him, leaving him no machine to dig with. Like I have said before, for a project like this to be done right it needs to be dug out about six inches in each direction, and nine inches deep. (Writers note: Some poetic license is taken with the following) I imagine what happened next went a little like this: Red bull was purchased and a town/family meeting was called. Shovels were thrust, picks were swung, and names were called. However it played out, by the end of the day the homeowner and his wife were out in the rain working with determination to get the job done. I am amazed by the work they put in to get the prep work done!
When I arrived on the job site I came equipped with a small grading machine. Needless to say, the homeowners were a wee bit jealous of the mechanical help I had. I moved the stone around and filled the excavated area to nearly ground level with sub-base stone. Because the pavers were delivered late were were a bit behind schedule but by day two I was able to put up the front steps (massive and full body solid 6'x6"x16" steps), then the 4’ x12’ went in. Day three I started the back of the house with an identical set of steps that went well with the size of the house coming down to a 10'x10' patio.
Things had been going pretty well up till that point but about three quarters of the way through the patio the wind became so strong and began blowing sand all over the place! As much and I love sand storms I had to call it a day. Day four, the last and final day, I was able to finish laying the patio stones and get the fire pit completed.
Despite all the twists and turns this job involved it turned out great and the homeowner was very pleased with it. He said he doesn’t even think a picture can do it justice. Nevertheless, I’ve put a few pictures of the job up here. Check it out and let me know what you think.
|


 RSS Feed